
Create custom forms
How to create a custom form
The setup of a form follows 3 steps:
Step 1: Create a form and submit basic information
Step 2: Add fields into the new form
Step 3: Insert the form in a menu
Step 1: Create a form and submit basic information
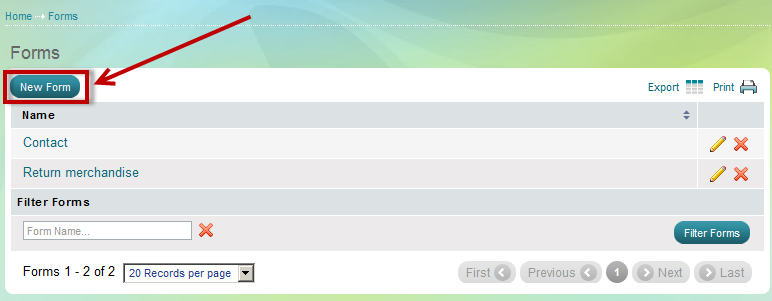
- Go to the Website Content menu, under 'Website Content' click on Forms link.'Forms' page appears.

- Click on 'New Form' button on top of the page. 'Create form' page appears.
- Submit basic information.
The first half of 'Create Form' page
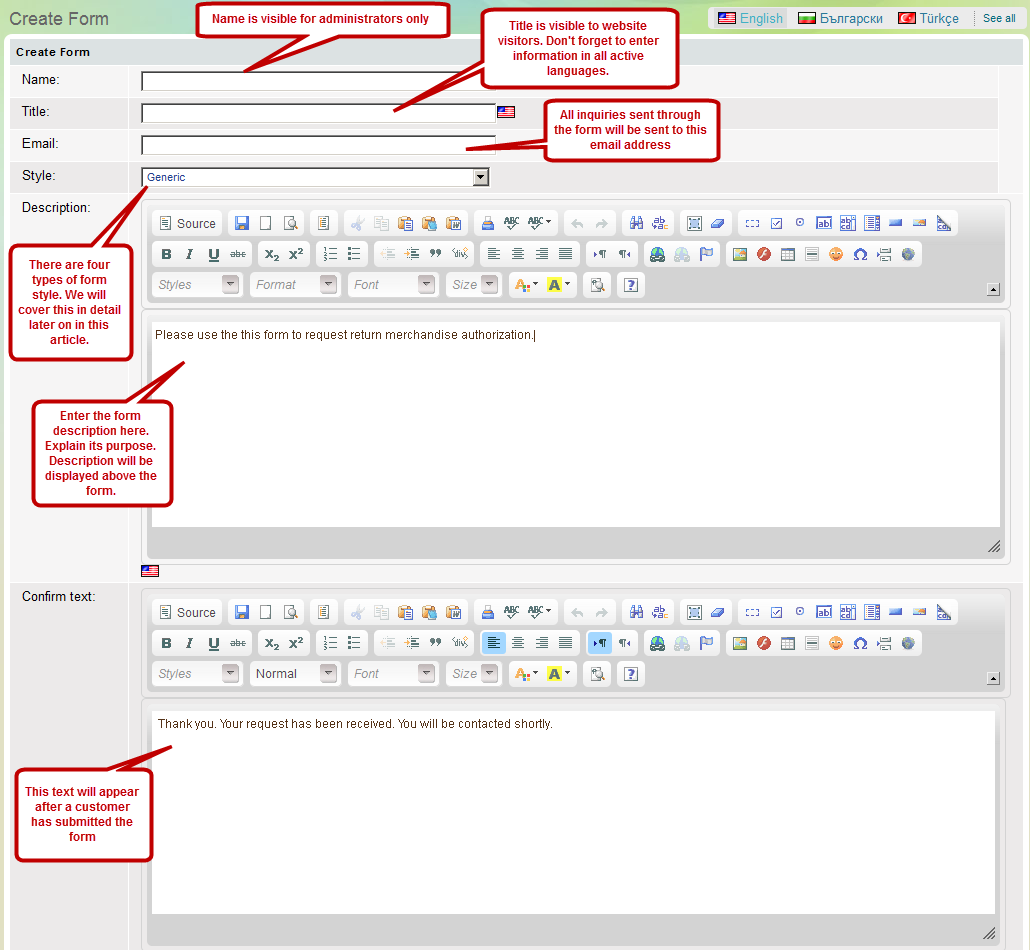
Form's Name and Title
Name is used to identify a form in the Summer Cart admin panel and is visible to administrators only. Besides the name of a form, the store administrator defines a Title for the form which is visible to the public and can be displayed in multiple languages.
Form's Style
There are 4 built-in styles from which you can choose. Click on Settings link next to each of the style and the "Settings" pop-up will appear.
Header and text fields are optional and can be filled with additional information.
You can enable Google Map for the form
Enter address coordinates. For more information you can visit the following address - http://support.google.com/maps/bin/answer.py?hl=bg&answer=18539
Choose how much map will be zoomed
Choose type of the map - Hybrid, Roadmap, Satellite, Terrain
Upload image which will appear on the top of the form in the clients area.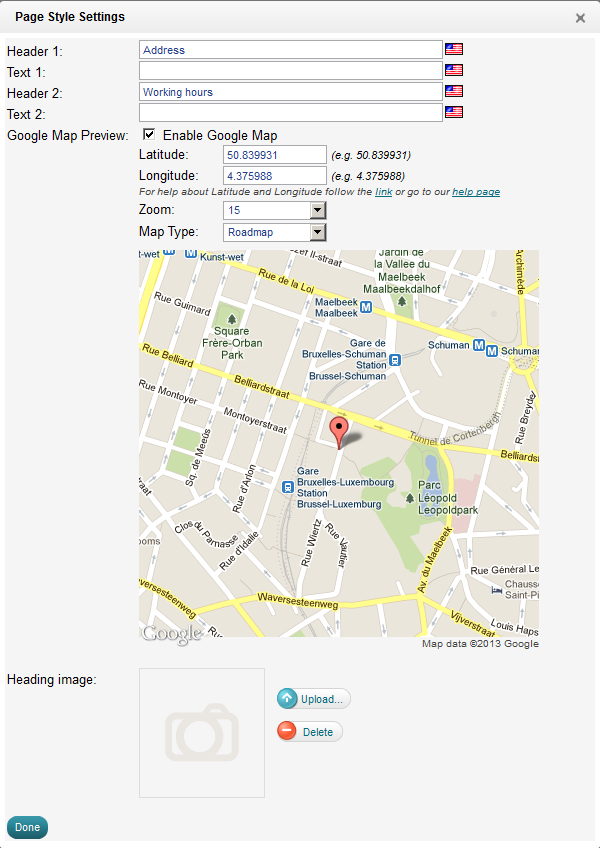
Description
Enter the form description here. Explain its purpose. Description will be displayed above the form. Don't forget to enter information in all active languages, by clicking the flag icon below which will switch language.Confirm text
This text will appear after a customer has submitted the form.
Enter the page title. This will help for better Google ranking.
I will use custom urls
if you enable this option, you will be able to configure SEO friendly url address, again - for better Google ranking.
Enable captcha
Captcha is a field that contains randomly generated string of numbers and letters that your customers will have to recognize and enter in the field below, in order to be able to submit the form. Captcha is very useful for spam bot prevention.
Step 2: Add fields into the new form
You can create a form as large as you need and choose among 11 different fields.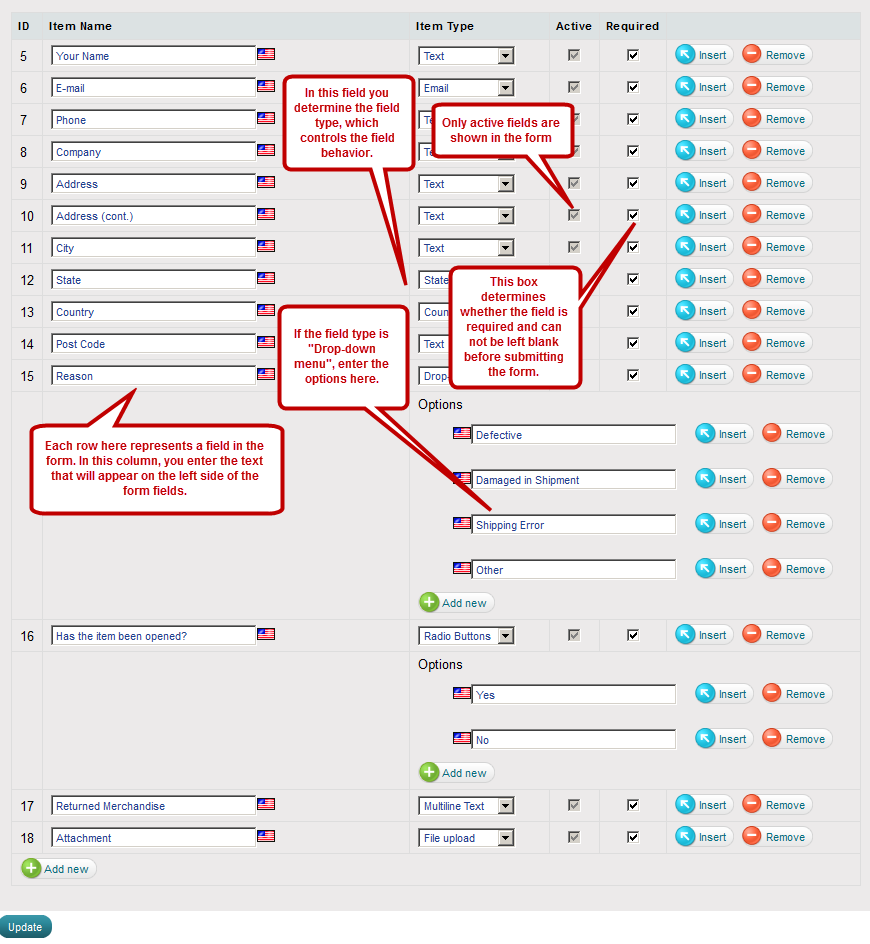
|
Base fields |
Specific fields |
Display fields |
|
Text |
Website visitors can submit a few words in a single line. Usually it is applicable for name and address. |
|
Multi line text |
Website visitors can submit a long text in many lines. Usually it is used when further instructions or explanations are needed. |
|
Checkbox |
Website visitors can opt for a specific or additional feature. Usually it is used when you need their agreement for something (as for Opt-in mailing list) or to make them select multiple options from a list. |
|
Radio buttons |
Radio buttons can be 2 or more. Website visitors can choose only one option among all. Usually it is used about gender (Male or Female) or to answer questions that need Yes/No answers. It is suitable for a short list. |
|
Drop-down list |
Website visitors can choose only one option among numerous ones. It is suitable for a long list. |
|
|
|
|
|
Website visitors can submit an email address. Summer Cart system automatically validates the email address. |
|
Number |
Website visitors can submit numbers like phone and fax numbers, order and invoice numbers and other important numbers. The field is validated. |
|
Countries |
Website visitors can select a country from the available Countries list. To manage Countries list see Countries topic. |
|
States |
Website visitors can select a state from the available States list. To manage States list see States topic. |
|
File Upload |
Website visitors can upload file from their computer. |
|
Custom HTML |
Website owner can insert custom html code in this field. |
|
Header |
This is the header of a section inside the form, such as 'Contact Information'. Use headers to group related fields. |
|
Separator |
Displays a horizontal line. Use it to separate fields. |
Button  inserts a new field or option above the current one.
Button  removes a field or an option.
Button  inserts a new field or option below the current one.
Step 3: Insert the form in a menu