Summer Cart localhost installation with Wamp
Summer Cart requires Аpache, PHP и MySQL to be installed on the computer where you will do the installation. The easiest way to install this requirements is to get a package which includes three of them. In this article we will use WampServer(acronym for Windows Apache MySQL PHP
Server). You can download it from here for free. Installation process is quite easy and we won't describe it in this article. We will install our WampServer in folder C:\wamp\ This is the default installation folder and if you don't change anything settings during the installation, your Wamp will be installed in the same folder. After the installation, start Wamp. You will see this icon -  next to your other tray icons. If it's green everything is OK and you web server is running.
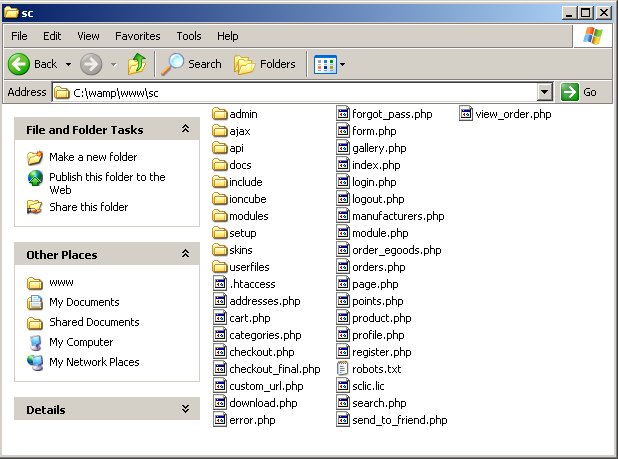
- For installing Summer Cart you need installation files which are compressed in archive. The name of the archive file is something similar to this - [2011-07-12]summer_cart-4.0.tar.gz Only the date at the beginning can be different. You also need a license file with name sclic.lic Open folder - C:\wamp\www
This is root folder of your web server. There are two files in this folder by default. You can delete them and copy Summer Cart in this folder. Better way is to create new sub-folder (we created such folder with name sc)
and upload Summer Cart's files and the license file there.
- After copying the files to the folder you can proceed with the installation of Summer Cart. Open web browser and enter in the address bar - localhost/sc or localhost(depends on where you've put the installation files). This will start the installation wizard.

-
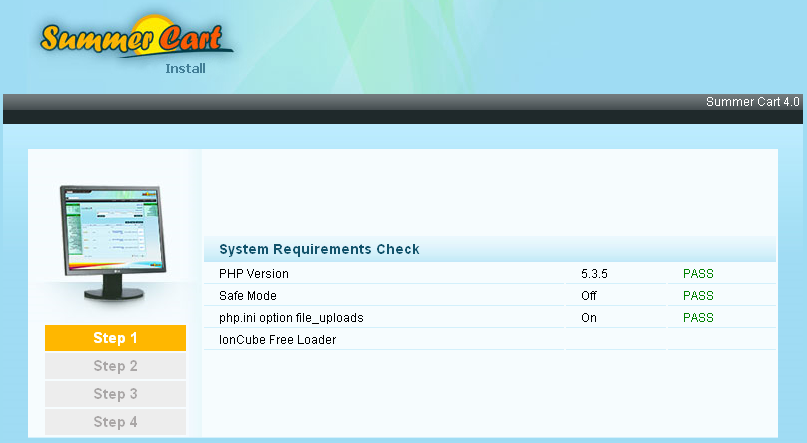
You will see the following screen:
-
Wamp doesn't meet all system requirements of Summer Cart and you need to install two additions to your web server - IonCube Free Loader and cURL extension. Actually this is the reason why you can't proceed with the installation. There is ioncube folder in Summer Cart's installation files, but the files are for Linux based systems and we need to download new files for Windows. Files can be found here - http://downloads2.ioncube.com/loader_downloads/ioncube_loaders_win_vc6_x86.tar.gz Download the archive and copy the files from it in folder - C:\wamp\www\sc\ioncube Actually we need only one file from that archive - ioncube_loader_win_5.3.dll 5.3 is the version of the PHP. You can get version of your PHP from the installation wizard(screen above) - PHP Version - 5.3.5 It is possible your PHP version to be different and you need to get the .dll file which corresponds to your PHP version. You need to enter the path to the .dll file in the Apache's php.ini file in order to install IonCube Free Loader.
This is the path in our case:
C:\wamp\www\sc\ioncube\ioncube_loader_win_5.3.dll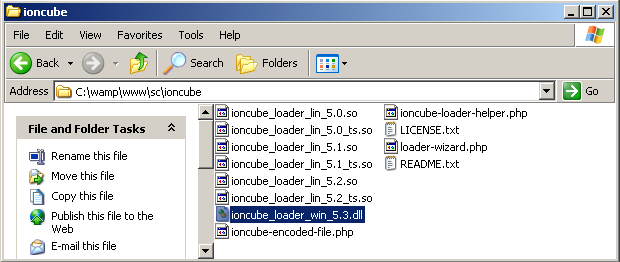
-
You can find the php.ini file in folder - C:\wamp\bin\apache\Apache2.2.17\bin
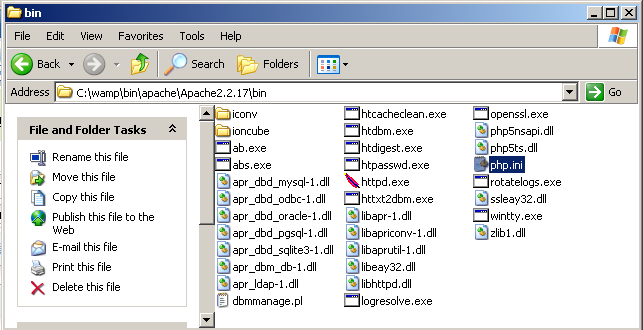
-
Open file php.ini with text editor like - Notepad. The only thing that you need to do is to add the following line right after [PHP]
zend_extension = "C:\wamp\www\sc\ioncube\ioncube_loader_win_5.3.dll"
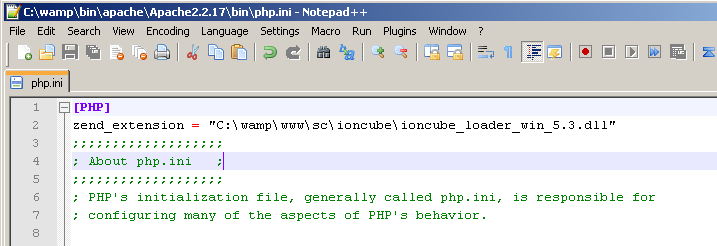
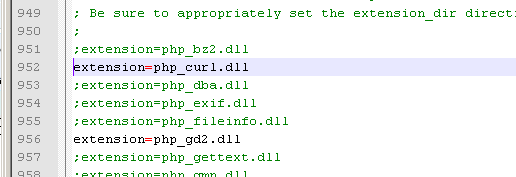
This is the path to the file - ioncube_loader_win_5.3.dll With this row you will install Ioncube Free Loader - In the same php.ini file find
;extension=php_curl.dll
Remove ; from the beginning of the row in order to install the cUrl Save the file.
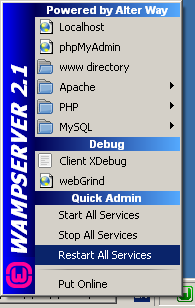
- Changes which you made won't take affect until you restart your web server. You can do this with left click on the green tray icon, than from the menu click on - Restart All Services.
- Ioncube и cUrl are installed. Now we can continue with the installation of Summer Cart at address - localhost/sc/ If everything is installed correctly you will see the following screen:

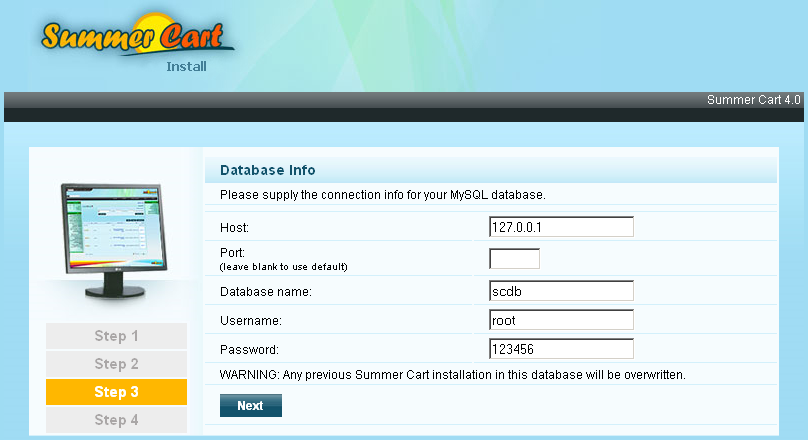
- Click - Next on the next two screens. You will see the screen below:
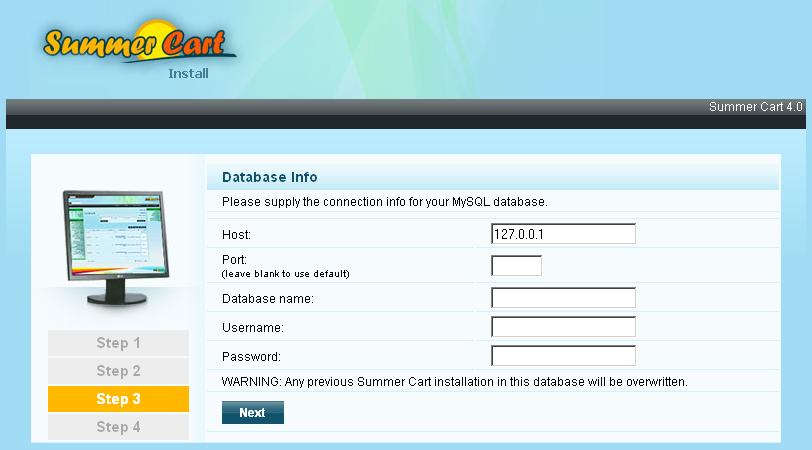
- On this step you need to enter the information about the connection to the MySQL database. By default there is username root without password which you can use. Summer Cart doesn't allow using username without password for the database and you need to set a password for username root. Open address - http://localhost/phpmyadmin/ and click on tab - Privileges Click on icon
 next to username - root with host - localhost
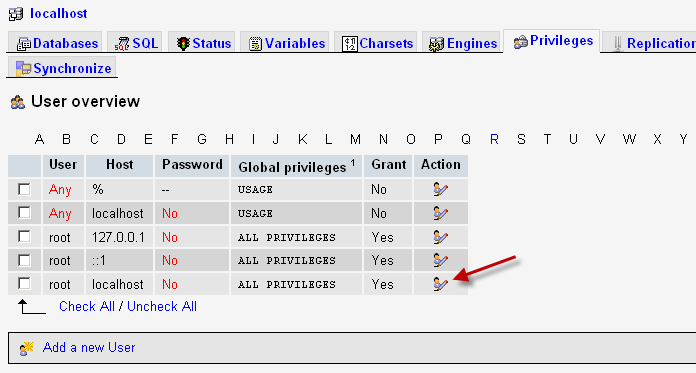
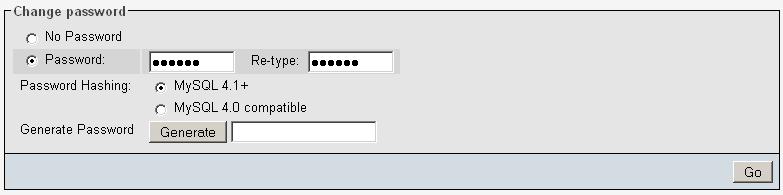
- New page appears. Find Change password section and enter whatever password you want to use. We entered - 123456 After that click on button Go for saving the changes.
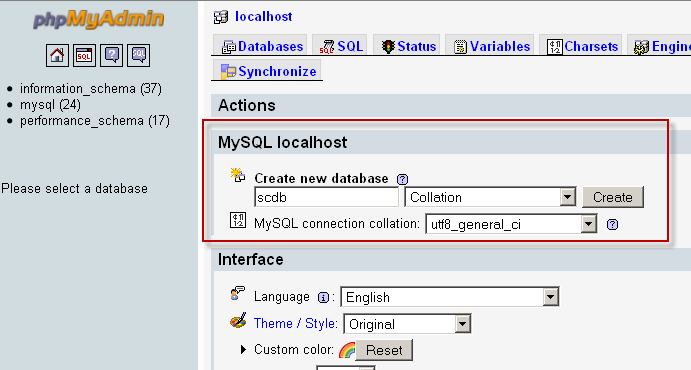
- Now you have username and password but you also need database where all data will be gathered. Open again - http://localhost/phpmyadmin/ Find Create new database, enter name of the database(we created database with name scdb) and click on Create button to create the new database.
- Now you've got everything required - username, password and database. Fill all the fields and click on Next
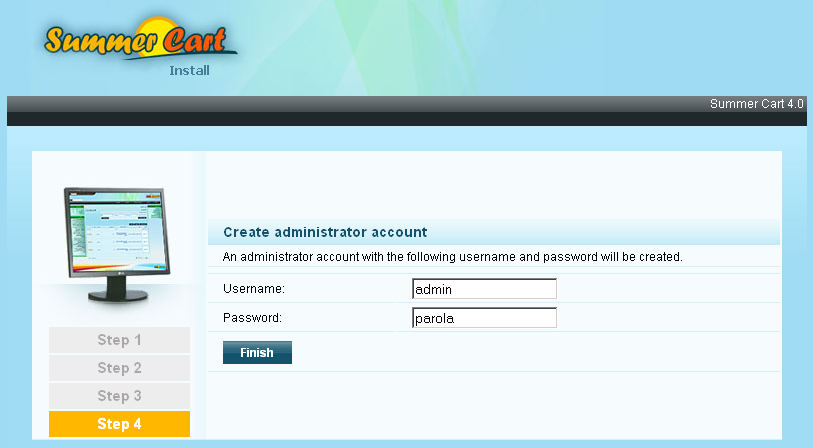
- Enter username and password which you will use for logging in to the administration panel of Summer Cart and click on Finish to finish the installation.